What should you do when working on a project that involves a lot of image processing?
We had to build an iOS app that needed to work relatively fast.
As the input and output were quite large, server processing was out of the question, if we wanted to deliver a nice and friendly user experience.
What to do then?
Oh yeah, we could use OpenCV. I’ve been tinkering quite a lot with it at university and knew that it should do the trick. What you should be aware of in this particular case is that OpenCV is not as straightforward as installing a cocoa pod. It needs additional tinkering before you can write your methods.
We’re going to show you how. Are you ready?
Setup
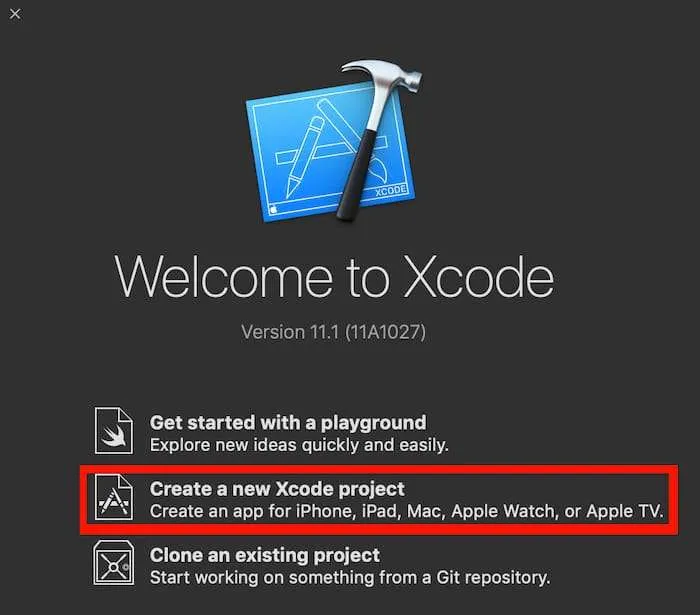
Create a new Xcode project
Select Create a new Xcode project.
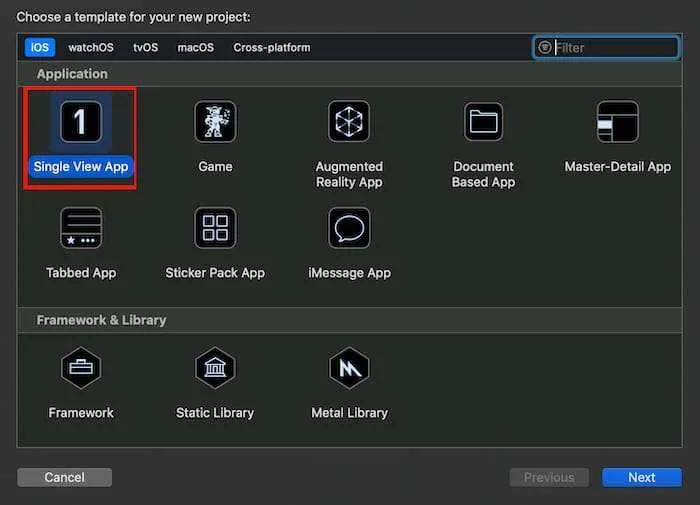
Select “Single View Application”.
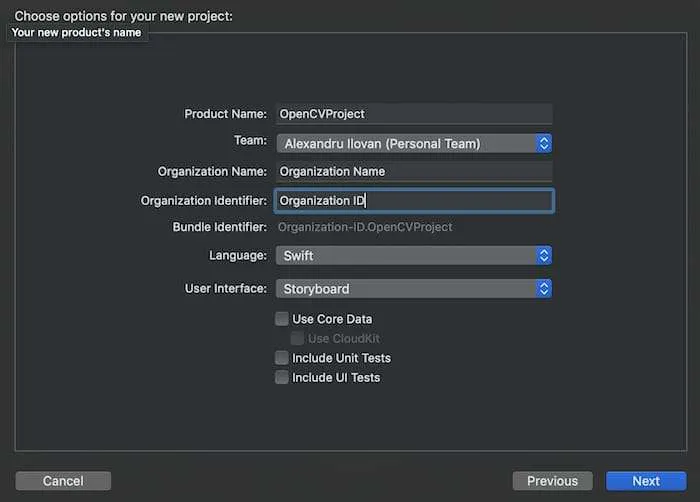
Name it however you want, I’m going with OpenCVProject.
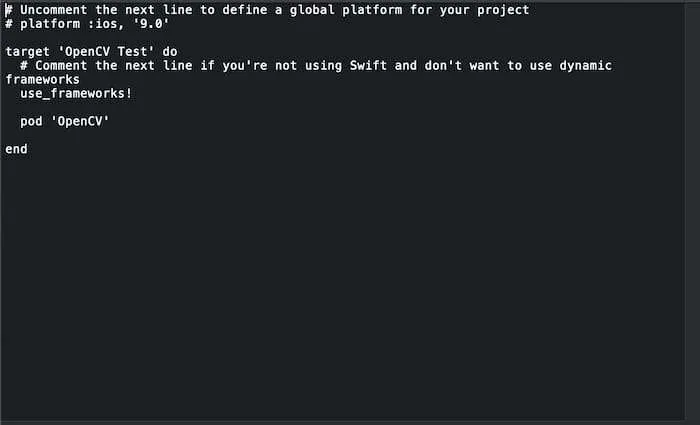
Then set up CocoaPods using pod init.
Add OpenCV to the Podfile
Add OpenCV to Podfile pod 'OpenCV' and run pod install in terminal.
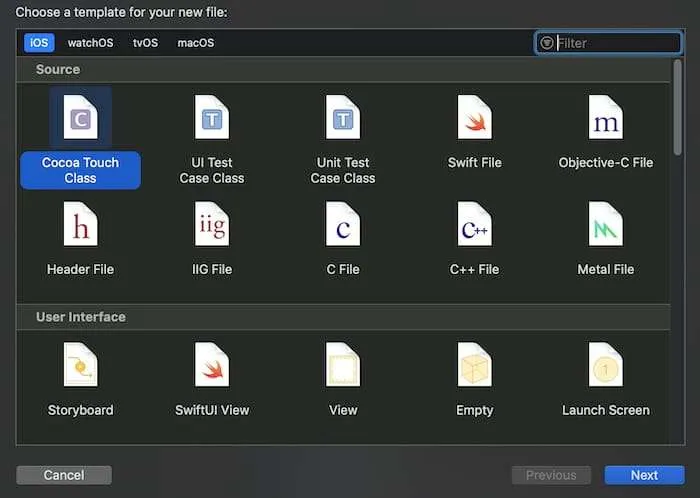
Create a Cocoa Touch Class
Click new -> file -> new file, select Cocoa Touch Class.
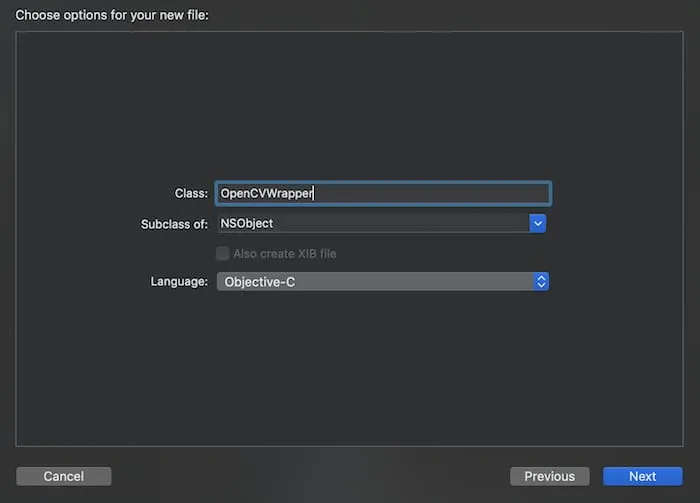
Name the class OpenCVWrapper
Name it OpenCVWrapper, a subclass of NSObject and set the language to Objective-C.
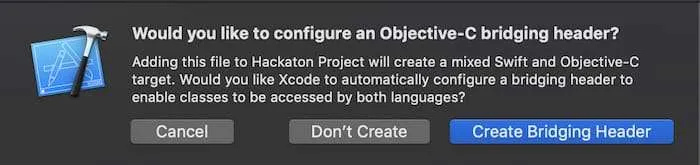
Create a bridging header
When Xcode prompts you if you like to configure an Objective-C bridging header, choose to create a bridging header. This bridging header is the file where you import Objective-C classes so that they can be visible in Swift.
Import the wrapper header
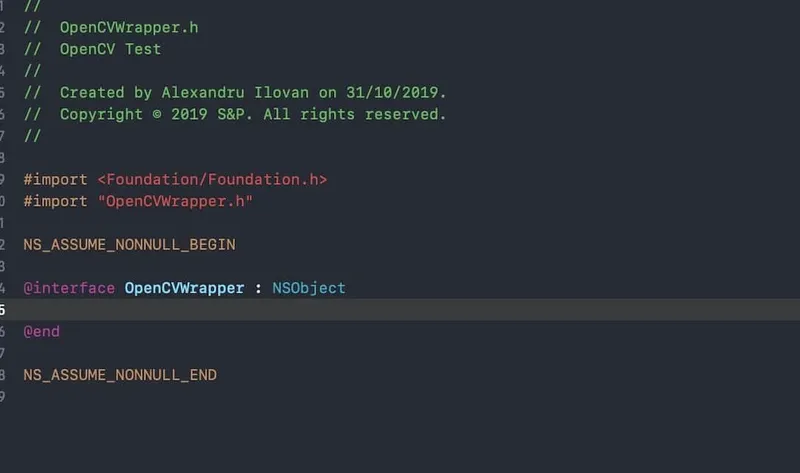
Import #import "OpenCVWrapper.h" in OpenCVWrapper.h.
//
//  OpenCVWrapper.h
//  OpenCV Test
//
//  Created by Alexandru Ilovan on 31/10/2019.
//  Copyright © 2019 S&P. All rights reserved.
//

#import <Foundation/Foundation.h>
#import "OpenCVWrapper.h"

NS_ASSUME_NONNULL_BEGIN

@interface OpenCVWrapper : NSObject
@end

NS_ASSUME_NONNULL_END
Import OpenCV
And #import <opencv2/opencv.hpp> in the OpenCVWrapper.m and #import "OpenCVWrapper.h" in OpenCVWrapper.h.
//
//  OpenCVWrapper.mm
//  OpenCV Test
//
//  Created by Alexandru Ilovan on 31/10/2019.
//  Copyright © 2019 S&P. All rights reserved.
//

#import "OpenCVWrapper.h"
#import <opencv2/opencv.hpp>

@implementation OpenCVWrapper

@end
Change the file extension
In order to use C++ inside Objective-C (OpenCV is written in C++ and C++ cannot interface directly with Swift), you need to change the file extension from OpenCVWrapper.m to OpenCVWrapper.mm.
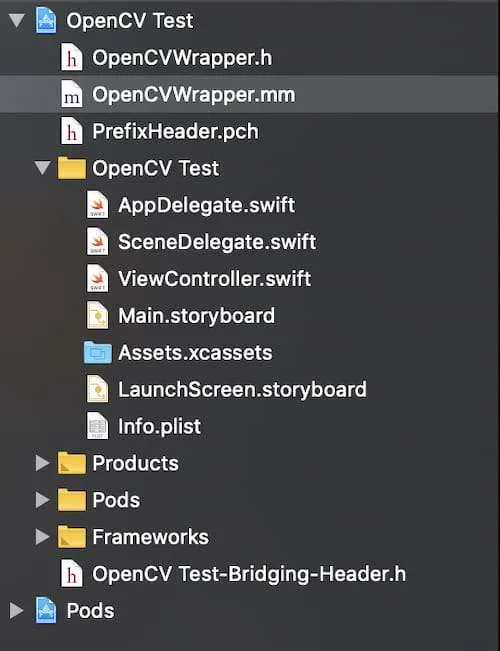
Add the wrapper to the bridging header
Add #import "OpenCVWrapper.h" to the Bridging-Header.
//
//  Use this file to import your target's public headers that you would like to expose to Swift.
//

#import "OpenCVWrapper.h"
Create a prefix header
Click new -> file -> new file, select Prefix header and create one.
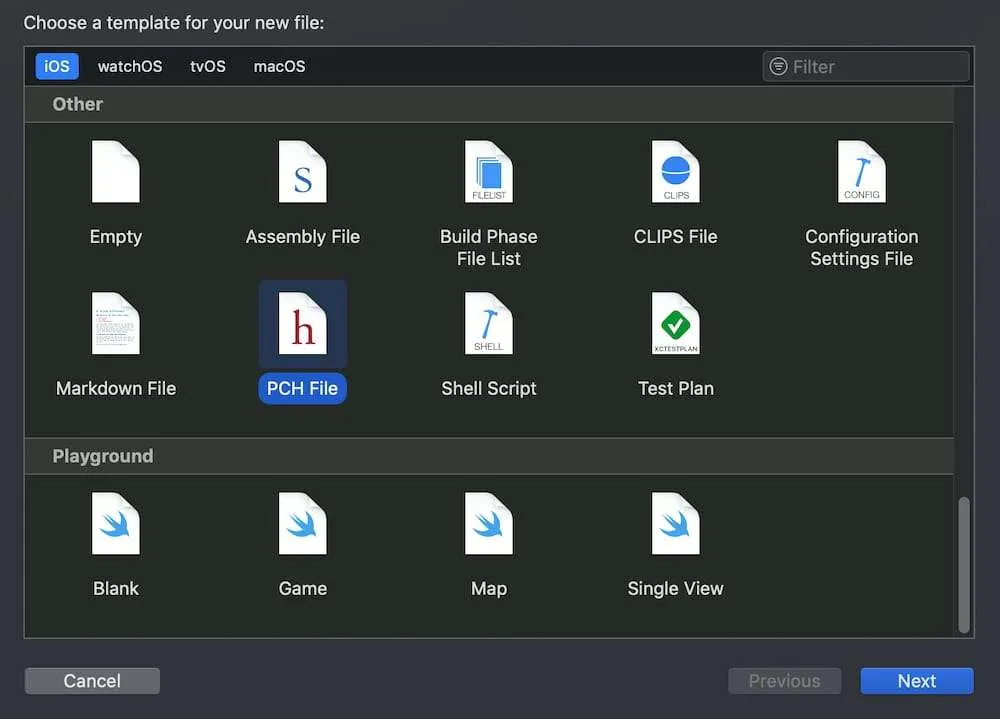
Include OpenCV in the prefix header
And add #ifdef __cplusplus #include <opencv2/opencv.hpp> #endif to it.
//
//  PrefixHeader.pch
//  OpenCV Test
//
//  Created by Alexandru Ilovan on 31/10/2019.
//  Copyright © 2019 S&P. All rights reserved.
//

#ifndef PrefixHeader_pch
#define PrefixHeader_pch

// Include any system framework and library headers here that should be included in all compilation units.
// You will also need to set the Prefix Header build setting of one or more of your targets to reference this file.

#ifdef __cplusplus
#include <opencv2/opencv.hpp>
#endif

#endif /* PrefixHeader_pch */
Set the prefix header path
Go on to your project navigator. Under Build Settings, search Prefix Header and add the correct path for your .pch file. It should be $(SRCROOT)/PrefixHeader.pch or $(SRCROOT)/YOUR_PROJECT/PrefixHeader.pch.
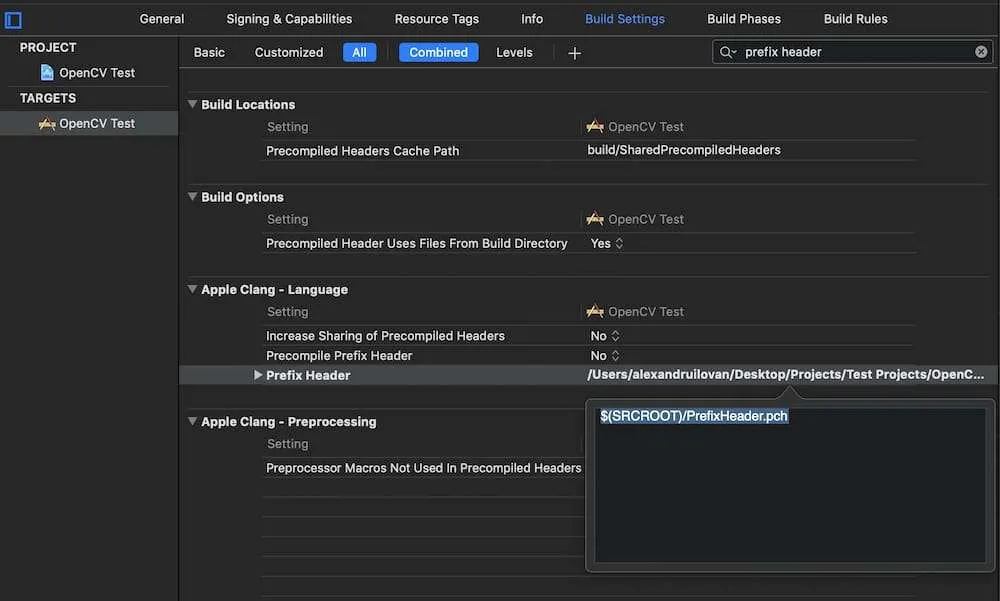
Testing it out
Now you can add methods in the OpenCVWrapper for your image processing and call them in Swift.
To test it out, we’ll show you some code snippets for taking an image and convert it into a matrix.
In the OpenCVWrapper.mm add the matFrom and imageFrom methods that we will mark private with a #pragma mark Private.
Don’t worry about the implementation details, they basically take an image and convert it into a matrix of pixels.
//
//  OpenCVWrapper.mm
//  OpenCV Test
//
//  Created by Alexandru Ilovan on 31/10/2019.
//  Copyright © 2019 S&P. All rights reserved.
//

#import "OpenCVWrapper.h"
#import <opencv2/opencv.hpp>

using namespace std;
using namespace cv;

@implementation OpenCVWrapper

+ (NSString *)openCVVersionString {
    return [NSString stringWithFormat:@"OpenCV Version %s",  CV_VERSION];
}

#pragma mark Public

+ (UIImage *)toGray:(UIImage *)source {
    cout << "OpenCV: ";
    return [OpenCVWrapper _imageFrom:[OpenCVWrapper _grayFrom:[OpenCVWrapper _matFrom:source]]];
}

#pragma mark Private

+ (Mat)_grayFrom:(Mat)source {
    cout << "-> grayFrom ->";

    Mat result;
    cvtColor(source, result, COLOR_BGR2GRAY);

    return result;
}

+ (Mat)_matFrom:(UIImage *)source {
    cout << "matFrom ->";

    CGImageRef image = CGImageCreateCopy(source.CGImage);
    CGFloat cols = CGImageGetWidth(image);
    CGFloat rows = CGImageGetHeight(image);
    Mat result(rows, cols, CV_8UC4);

    CGBitmapInfo bitmapFlags = kCGImageAlphaNoneSkipLast | kCGBitmapByteOrderDefault;
    size_t bitsPerComponent = 8;
    size_t bytesPerRow = result.step[0];
    CGColorSpaceRef colorSpace = CGImageGetColorSpace(image);

    CGContextRef context = CGBitmapContextCreate(result.data, cols, rows, bitsPerComponent, bytesPerRow, colorSpace, bitmapFlags);
    CGContextDrawImage(context, CGRectMake(0.0f, 0.0f, cols, rows), image);
    CGContextRelease(context);

    return result;
}

+ (UIImage *)_imageFrom:(Mat)source {
    cout << "-> imageFrom\n";

    NSData *data = [NSData dataWithBytes:source.data length:source.elemSize() * source.total()];
    CGDataProviderRef provider = CGDataProviderCreateWithCFData((__bridge CFDataRef)data);

    CGBitmapInfo bitmapFlags = kCGImageAlphaNone | kCGBitmapByteOrderDefault;
    size_t bitsPerComponent = 8;
    size_t bytesPerRow = source.step[0];
    CGColorSpaceRef colorSpace = (source.elemSize() == 1 ? CGColorSpaceCreateDeviceGray() : CGColorSpaceCreateDeviceRGB());

    CGImageRef image = CGImageCreate(source.cols, source.rows, bitsPerComponent, bitsPerComponent * source.elemSize(), bytesPerRow, colorSpace, bitmapFlags, provider, NULL, false, kCGRenderingIntentDefault);
    UIImage *result = [UIImage imageWithCGImage:image];

    CGImageRelease(image);
    CGDataProviderRelease(provider);
    CGColorSpaceRelease(colorSpace);

    return result;
}
@end
And also a method for transforming the colours associated with the matrix in grey:
+ (UIImage *)toGray:(UIImage *)source {
    cout << "OpenCV: ";
    return [OpenCVWrapper _imageFrom:[OpenCVWrapper _grayFrom:[OpenCVWrapper _matFrom:source]]];
}
And then finally the toGray method in the #pragma mark Public:
+ (UIImage *)toGray:(UIImage *)source {
    cout << "OpenCV: ";
    return [OpenCVWrapper _imageFrom:[OpenCVWrapper _grayFrom:[OpenCVWrapper _matFrom:source]]];
}
Also, don’t forget to add the method headers to the OpenCVWrapper.h:
//
//  OpenCVWrapper.h
//  OpenCV Test
//
//  Created by Alexandru Ilovan on 31/10/2019.
//  Copyright © 2019 S&P. All rights reserved.
//

#import <Foundation/Foundation.h>
#import "OpenCVWrapper.h"
#import <UIKit/UIKit.h>

NS_ASSUME_NONNULL_BEGIN

@interface OpenCVWrapper : NSObject
+ (UIImage *)toGray:(UIImage *)source;
@end

NS_ASSUME_NONNULL_END
Ok, next, go to the Main.storyboard add an imageView and a button and add a stock image to the assets and set it on the imageView.
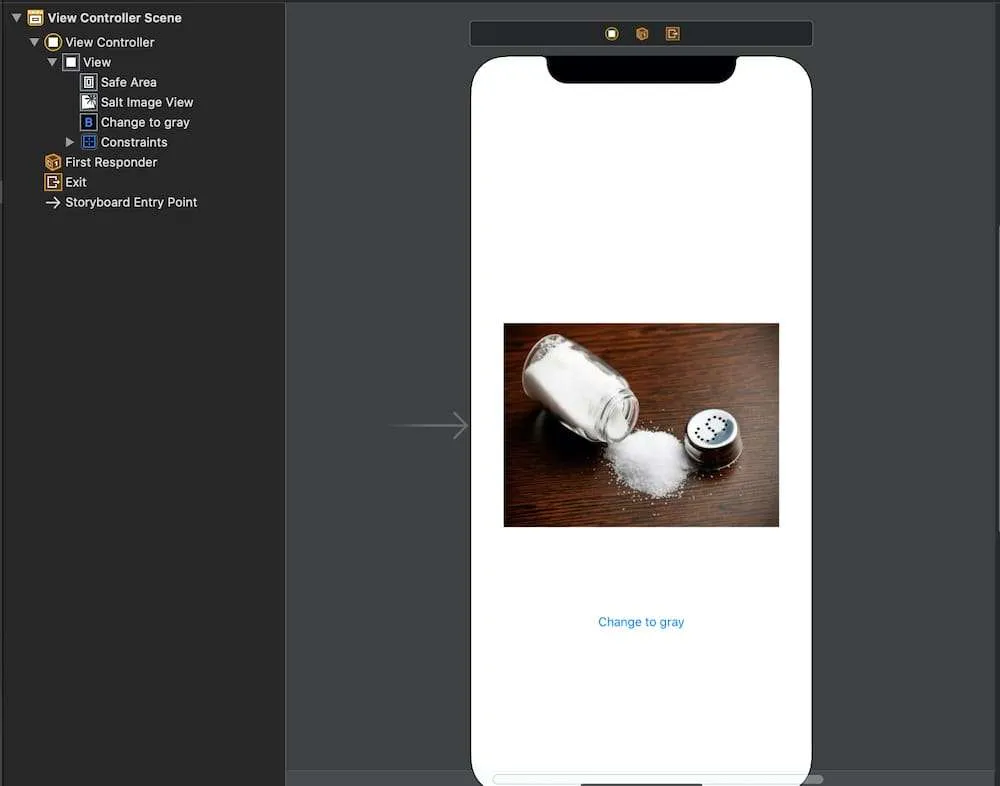
Next, connect the IBOutlets like so and call the toGray method from the OpenCVWrapper:
//
//  ViewController.swift
//  OpenCV Test
//
//  Created by Alexandru Ilovan on 31/10/2019.
//  Copyright © 2019 S&P. All rights reserved.
//

import UIKit

class ViewController: UIViewController {

    @IBOutlet weak var saltImageView: UIImageView!
    override func viewDidLoad() {
        super.viewDidLoad()
        // Do any additional setup after loading the view.
    }
    @IBAction func didPressedButton(_ sender: Any) {
        let grayImage = OpenCVWrapper.toGray(saltImageView.image!)
        saltImageView.image = grayImage
    }
}
Finally, run the app. If you click on the button, it should greyscale the image. You’ve done it!
There you have it, OpenCV Swift Wrapper with one of the most basic operations that you can do in image processing.
Have fun and keep on learning!